
Ever since SQL Server 2005 was released, each object in a database has belonged to a database schema. SQL Server 2008 has continued with database schemas, and an explanation follows.
What is a Database Schema?
A database schema is a way to logically group objects such as tables, views, stored procedures etc. Think of a schema as a container of objects.
You can assign a user login permissions to a single schema so that the user can only access the objects they are authorized to access.
Schemas can be created and altered in a database, and users can be granted access to a schema. A schema can be owned by any user, and schema ownership is transferable.
Creating a Database Schema
To create a database schema in SQL Server 2008:
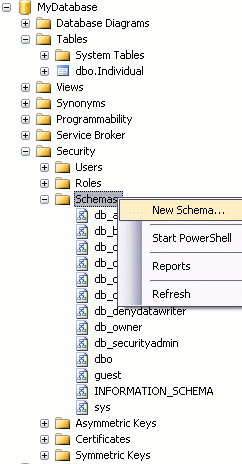
- Navigate to Security > Schemas
- Right click on Schemas and select New Schema.... Like this:
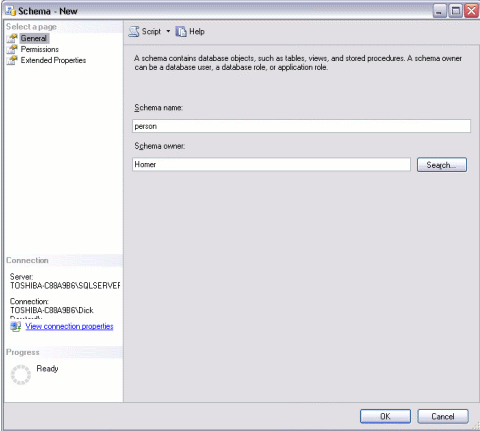
- Complete the details in the General tab for the new schema. In this example, the schema name is "person" and the schema owner is "Homer".
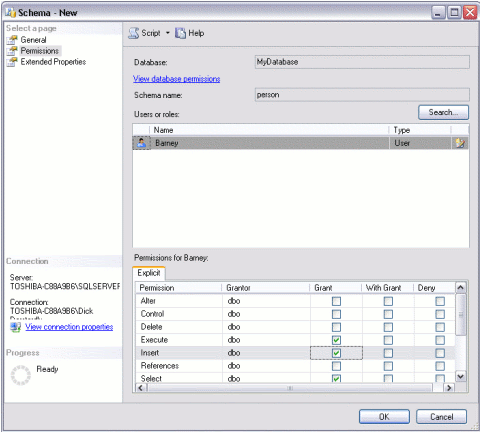
- Add users to the schema as required and set their permissions:
- Add any extended properties (via the Extended Properties tab)
- Click OK.
Add a Table to the New Schema
Now that we have a new schema, we can add objects such as tables, views, and stored procedures to it. For example, we could transfer the table that we created in the earlier lesson to the new schema.
When we created that table (called "Individual"), it was created in the default database schema ("dbo"). We know this because it appears in our object browser as "dbo.Individual".
To transfer the "Individual" table to the person "schema":
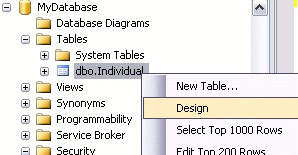
- In Object Explorer, right click on the table name and select "Design":
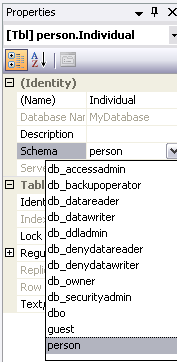
- From Design view, press F4 to display the Properties window.
- From the Properties window, change the schema to the desired schema:
- Close Design View by right clicking the tab and selecting "Close":
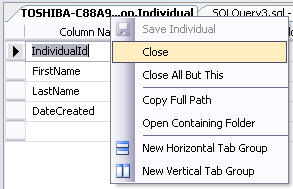
- Click "OK" when prompted to save
Your table has now been transferred to the "person" schema.
Confirm your Change
To confirm the change:
- Refresh the Object Browser view:
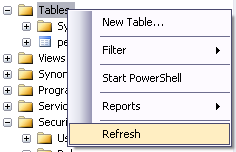
- You will now see that Object Browser displays the new schema for the table (person.Individual):


0 Comment to "SQL Server - Database Schemas"
Post a Comment